
You pay your energy bill. You stare at the number for a second longer than usual. It feels too high. Again.
So you turn down the thermostat. You open a window less. You try to “manage it.”
But nothing really changes.
Here’s the uncomfortable truth most homeowners in the US don’t realize until it’s too late:
Your house might be leaking money every single day.
Not because of your appliances. Not because of your usage habits. But because of something hidden behind your walls, above your ceiling, and under your floors. Insulation.
When insulation is poor, missing, or outdated, your home loses heat in winter and traps heat in summer. Your HVAC system works harder. Your energy bills climb higher. And you end up paying for comfort you never fully get.
And here’s the part that surprises most people: You don’t need expensive insulation to fix it.
There are cheap insulation options in the US that actually work. Some cost far less than people expect. Some can be installed yourself. And many can start saving you money within the first few months.
This guide is not just another list of insulation types.
It’s a complete, practical roadmap designed for real people who want to lower their energy bills without overspending.
Here’s exactly what you’ll learn:
- The best cheap insulation materials that deliver real performance
- Where to use each type for maximum efficiency
- How to avoid common mistakes that waste money
- Simple installation tips for beginners and DIY homeowners
- How much money you can realistically save
By the time you finish this guide, you’ll understand something most people don’t:
The difference between cheap insulation that fails and cheap insulation that quietly saves you hundreds of dollars every year.
And once you see it, you won’t look at your home the same way again.
Why Insulation Matters More Than You Think
Most people think insulation is just something builders add to walls and forget about.
In reality, insulation is one of the most important systems in your home. It controls how heat moves in and out, and that directly affects how much money you spend every month on energy.
If your home isn’t properly insulated, it doesn’t matter how efficient your HVAC system is. You are still losing money.
How Heat Actually Moves in Your Home
To understand insulation, you need to understand one simple principle:
Heat always moves from warm areas to cold areas.
- In winter, heat escapes from inside your home to the cold outside
- In summer, heat from outside pushes its way into your home
This movement happens through:
- Roof and attic
- Walls
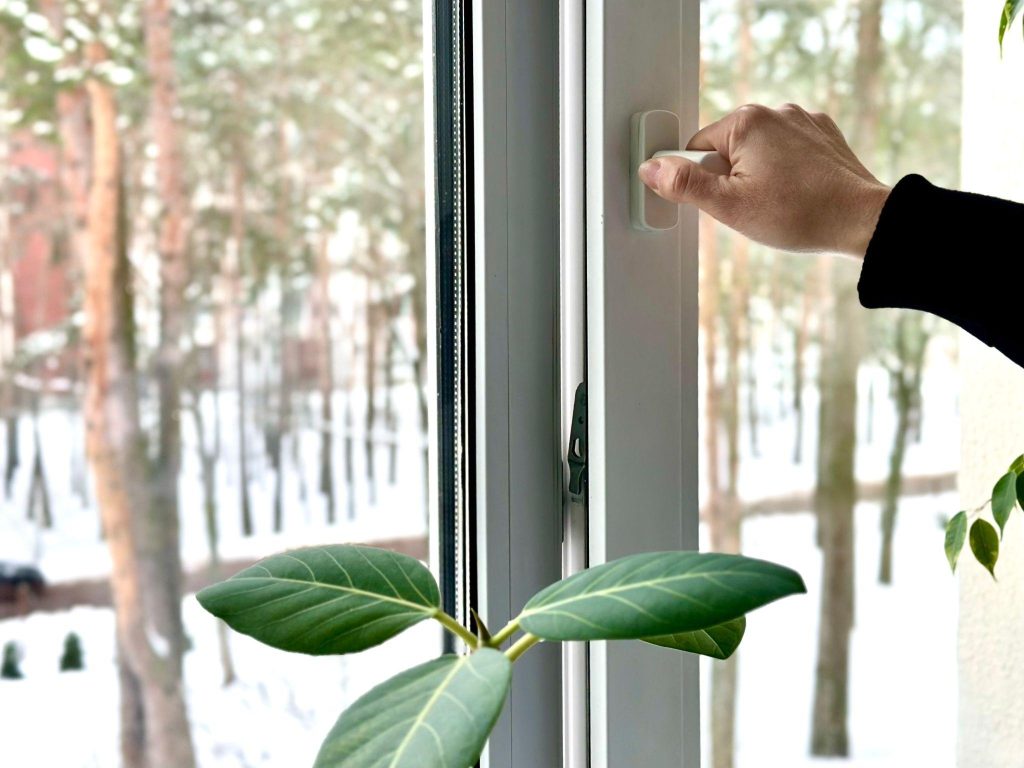
- Windows and doors
- Floors and crawl spaces
Without proper insulation, your home becomes a constant exchange system where you are paying to heat or cool air that doesn’t stay.
The Biggest Energy Loss Areas Most People Ignore
1. The Attic (Biggest Energy Leak)
Heat rises. That means your attic is the number one place where energy escapes.
If your attic insulation is thin or missing, you are essentially heating the outdoors during winter.
2. Walls (Hidden Loss You Can’t See)
Walls may look solid, but without insulation, they allow heat to pass through easily.
This is why some rooms feel colder or hotter than others.
3. Floors and Crawl Spaces
Cold air can seep up from below, especially in older homes.
This is often overlooked but can make a big difference in comfort.
4. Small Gaps and Air Leaks
Even tiny gaps around windows, doors, and vents can let air escape.
These leaks reduce the effectiveness of insulation and increase energy costs.
What Is R-Value and Why It Matters
When shopping for insulation in the US, you’ll see something called R-value.
This is simply a measure of how well insulation resists heat flow.
- Higher R-value means better insulation performance
- Lower R-value means more heat passes through
Different parts of your home require different R-values depending on climate and location.
For example:
- Attics usually need higher R-values
- Walls need moderate levels
- Floors vary depending on conditions
The key takeaway:
You don’t need the highest R-value everywhere. You need the right R-value in the right place.
How Insulation Saves You Money Over Time
Here’s where things get practical.
When your home is properly insulated:
- Your heating system runs less in winter
- Your air conditioning runs less in summer
- Your home maintains temperature longer
- Your energy bills decrease
In many US homes, proper insulation can reduce energy costs by a noticeable percentage over time.
That means cheap insulation is not just an expense.
It’s an investment that pays you back.
Comfort Matters Just as Much as Cost
Saving money is important, but comfort is what you feel every day.
Good insulation helps:
- Eliminate cold drafts
- Keep rooms evenly heated or cooled
- Reduce outside noise
- Improve overall living conditions
It turns your house from a place you tolerate into a place you enjoy.
The Reality Most Homeowners Discover Too Late
Many people upgrade appliances, buy smart thermostats, or try to “optimize” their energy usage.
But they skip insulation.
And that’s why they don’t see real results.
Because without insulation, all those improvements are working against a losing system.
The Simple Truth
If your home is not properly insulated, you are:
- Paying more than you should
- Feeling less comfortable than you deserve
- Losing energy every single day
And the solution does not have to be expensive.
What Makes Insulation Cheap vs Expensive
By now, you understand that insulation can save you money. But here’s where most homeowners get confused:
Why does one type of insulation cost so little, while another costs significantly more?
And more importantly, does expensive insulation always perform better?
The answer is not as straightforward as most people think.
The Three Factors That Control Insulation Cost
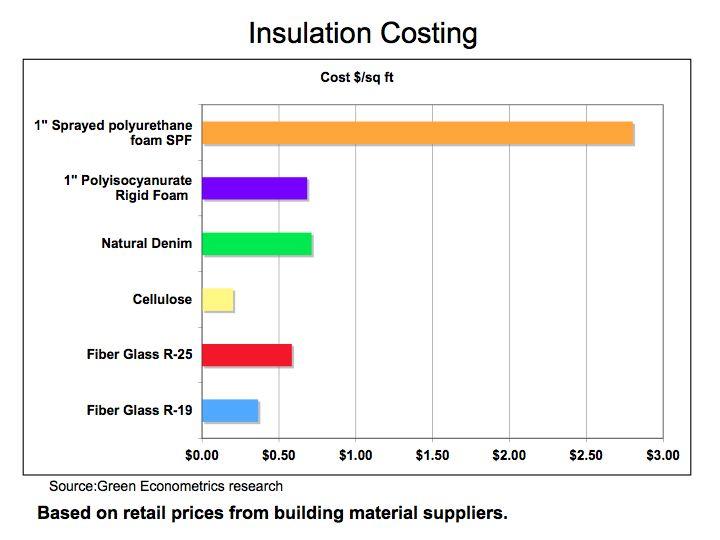
Insulation pricing in the US comes down to three main things:
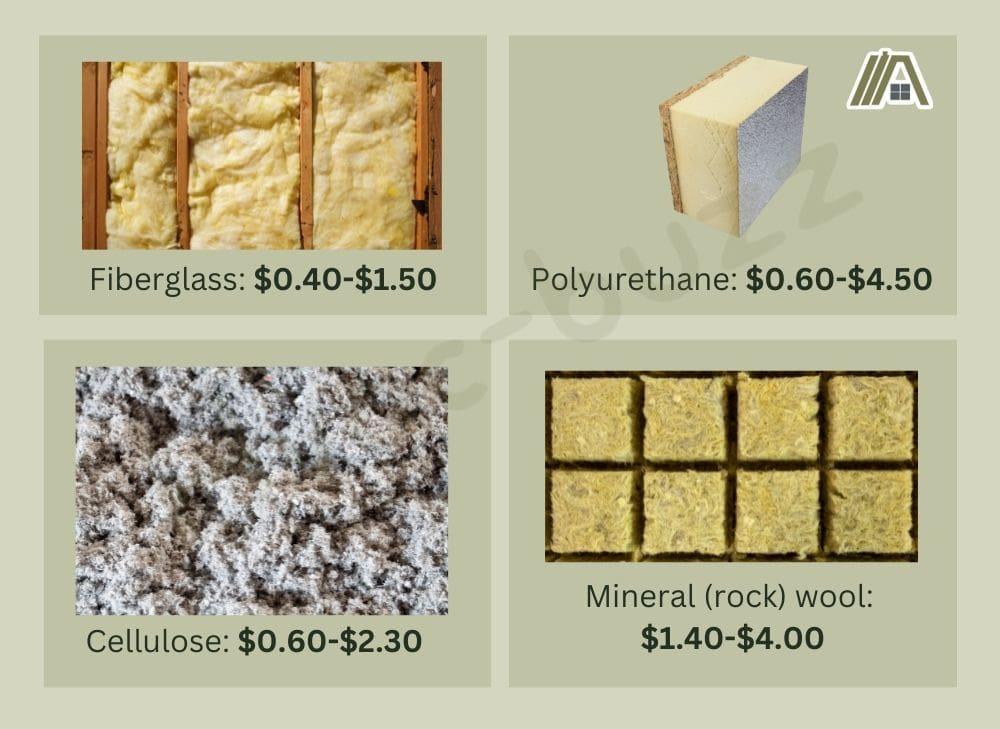
1. Material Type
Different insulation materials have different production costs.
- Fiberglass is mass-produced and widely available, making it one of the cheapest
- Cellulose uses recycled materials, keeping costs low
- Spray foam involves chemicals and specialized application, making it more expensive
This is why you can find fiberglass at a low price while spray foam costs much more per square foot.
2. Installation Method
This is where the biggest price difference often comes from.
- DIY insulation like fiberglass batts or foam boards is cheaper because you install it yourself
- Professional installation, especially for spray foam, adds labor costs
In many cases, the labor costs can exceed the material cost.
3. Coverage and Efficiency
Some insulation types cost more upfront but cover gaps better and last longer.
- Spray foam expands and seals air leaks
- Fiberglass sits in place but does not seal gaps
This means cheaper insulation may require more careful installation to achieve similar results.
Cheap vs Expensive Insulation: The Real Difference
Here’s the truth most guides won’t explain clearly:
Cheap insulation focuses on coverage. Expensive insulation focuses on sealing and efficiency.
- Cheap insulation slows down heat transfer
- Expensive insulation both slows and blocks airflow
That difference matters, but it does not always justify the higher cost.
When Cheap Insulation Is the Smarter Choice
Cheap insulation works extremely well when:
- You are insulating large areas like attics
- You are working within a tight budget
- You can install it properly yourself
- You combine it with basic air sealing
In these cases, fiberglass or cellulose can deliver excellent results for a fraction of the cost.
When Expensive Insulation Might Be Worth It
There are situations where spending more makes sense:
- Sealing hard-to-reach gaps and cracks
- Insulating small spaces where air leakage is severe
- Long-term energy savings in extreme climates
For example, spray foam may cost more upfront but can reduce energy loss more effectively in certain areas.
The Mistake That Costs Homeowners the Most
Many people assume that buying the most expensive insulation guarantees the best results.
It doesn’t.
The biggest factor is not the price. It’s how well the insulation is installed.
Poorly installed expensive insulation can perform worse than properly installed cheap insulation.
The Smart Approach to Saving Money
Instead of choosing between cheap and expensive, smart homeowners combine both:
- Use cheap insulation for large areas like attics and walls
- Use targeted solutions like foam for sealing gaps
This hybrid approach gives you the best balance between cost and performance.
The Bottom Line
Cheap insulation is not inferior. It simply requires:
- Better planning
- Proper installation
- Attention to detail
When done correctly, it can deliver nearly the same comfort and savings as more expensive options.
Types of Cheap Insulation (Full Breakdown)
This is the section that separates a casual reader from a smart homeowner. Here, we dive deep into the best cheap insulation options in the US, how to use them, and how much you can expect to pay.
Fiberglass Insulation – The Most Popular Budget Option
Fiberglass insulation is the go-to choice for many homeowners looking for affordable performance.
Key Details:
- Cost: $0.30 to $1.50 per square foot
- Best Use: Attics, walls, and ceilings
- Pros: Widely available, easy to cut, effective thermal resistance
- Cons: Can be itchy; must be properly installed for maximum efficiency
Tips for Best Results:
- Wear protective gloves and a mask
- Ensure there are no gaps between batts
- Don’t compress the insulation, it reduces effectiveness
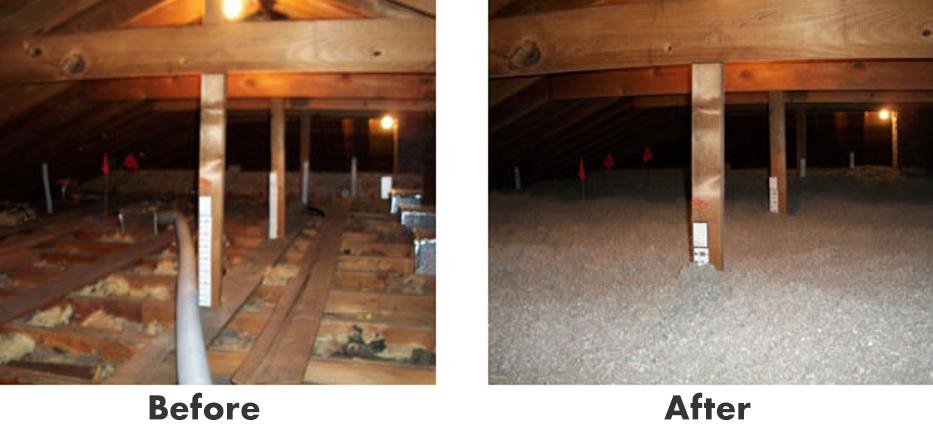
Cellulose Insulation – Eco-Friendly and Affordable
Cellulose is made from recycled paper and is often blown into attics or wall cavities.
Key Details: 
- Cost: $0.60 to $1.50 per square foot
- Best Use: Attics and retrofit walls
- Pros: Eco-friendly, good airflow resistance, conforms to spaces easily
- Cons: Can settle over time, may require top-up after several years
Tips for Best Results:
- Ensure proper vapor barriers if recommended for your climate
- Use a professional blower for large areas
- Combine with basic air sealing for maximum efficiency
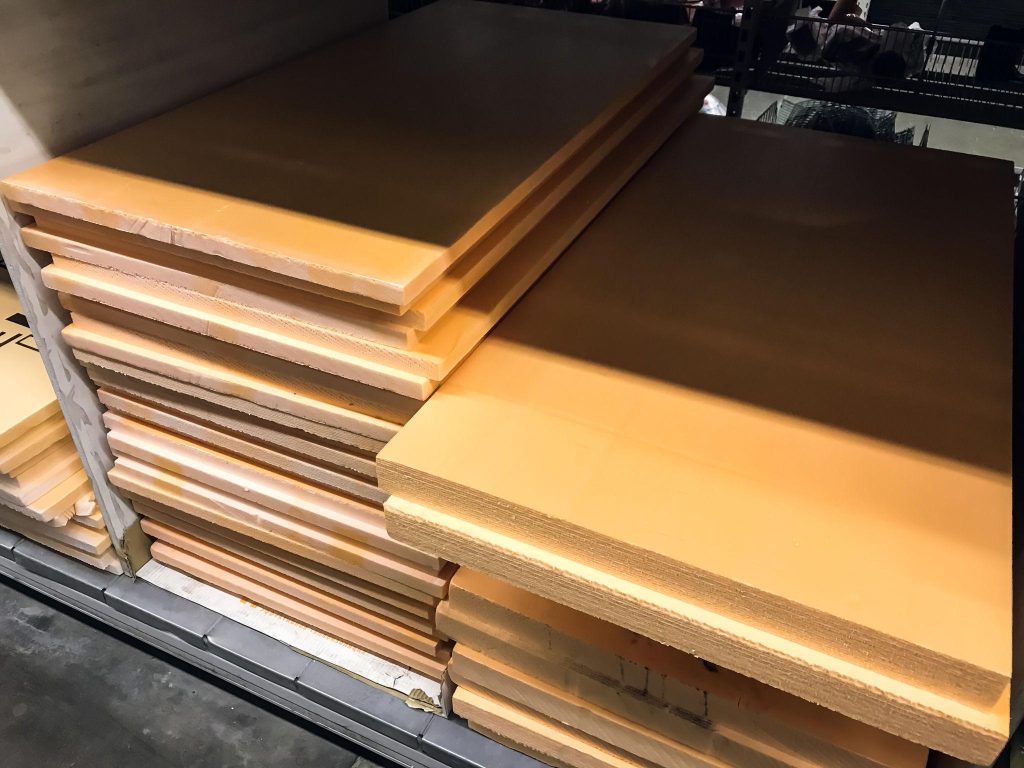
Foam Board Insulation – Ideal for Small Projects
Foam board, also called rigid insulation, is cheap and effective for targeted applications like basements, garages, and walls.
Key Details: 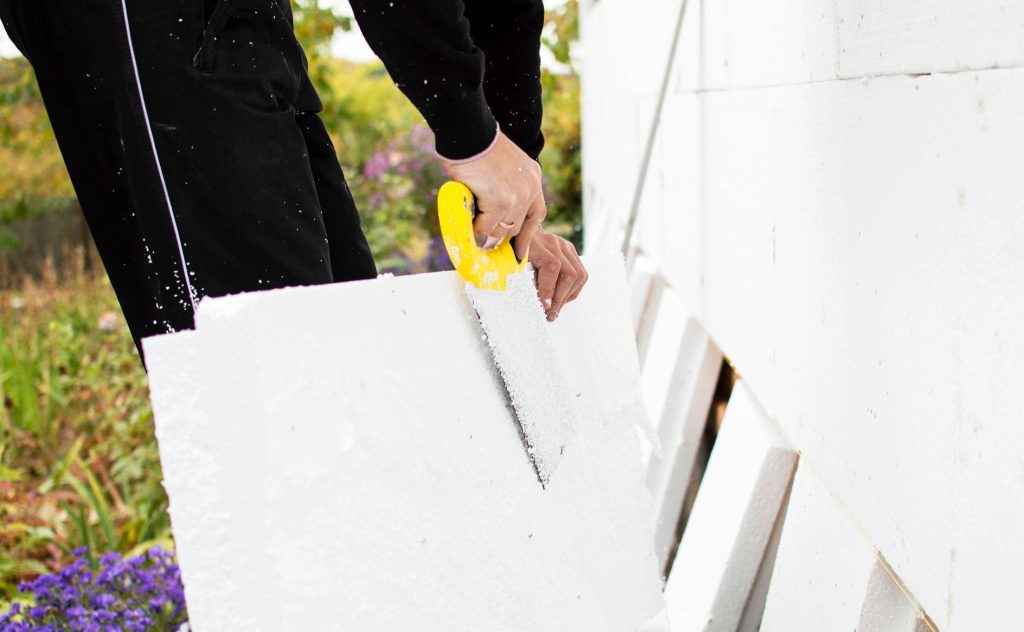
- Cost: $1.20 to $2.50 per square foot
- Best Use: Basement walls, garage walls, small renovation projects
- Pros: Lightweight, easy to cut, decent thermal resistance
- Cons: Requires precise cutting; gaps reduce effectiveness
Tips for Best Results:
- Seal edges with tape or caulk
- Combine with other insulation types for larger areas
- Protect from direct sunlight if installed externally
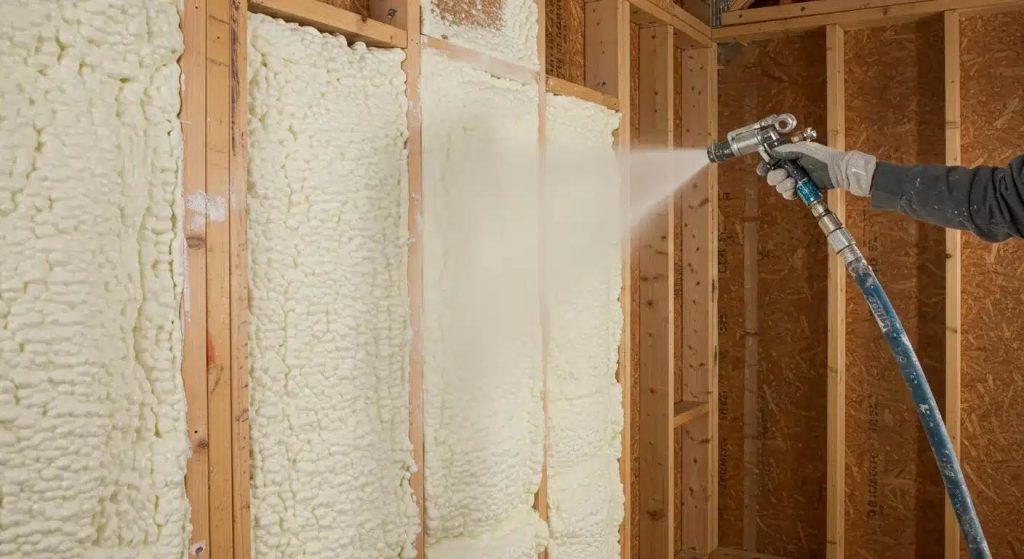
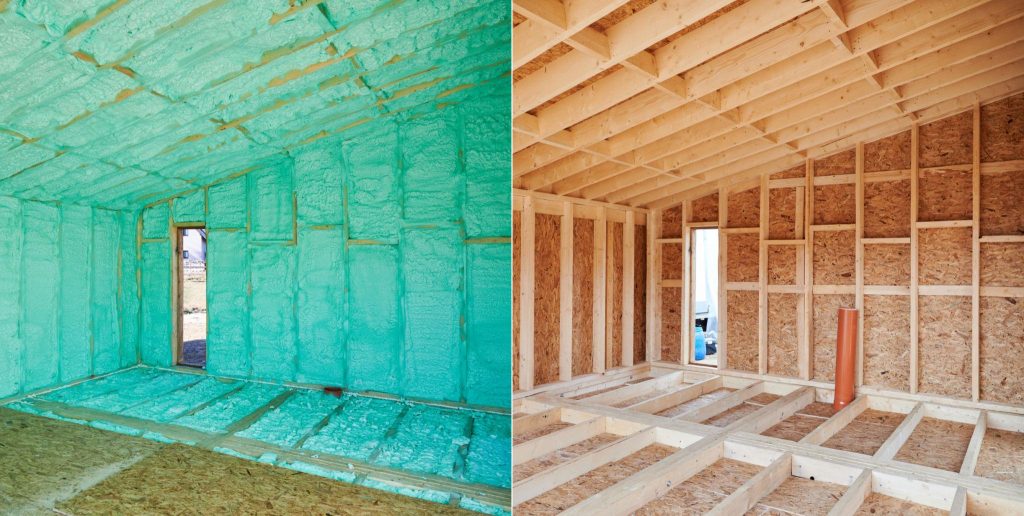
Spray Foam Insulation – Affordable DIY Kits Available
Spray foam is often seen as expensive, but DIY kits make it accessible for homeowners looking to seal gaps and achieve higher efficiency.
Key Details: 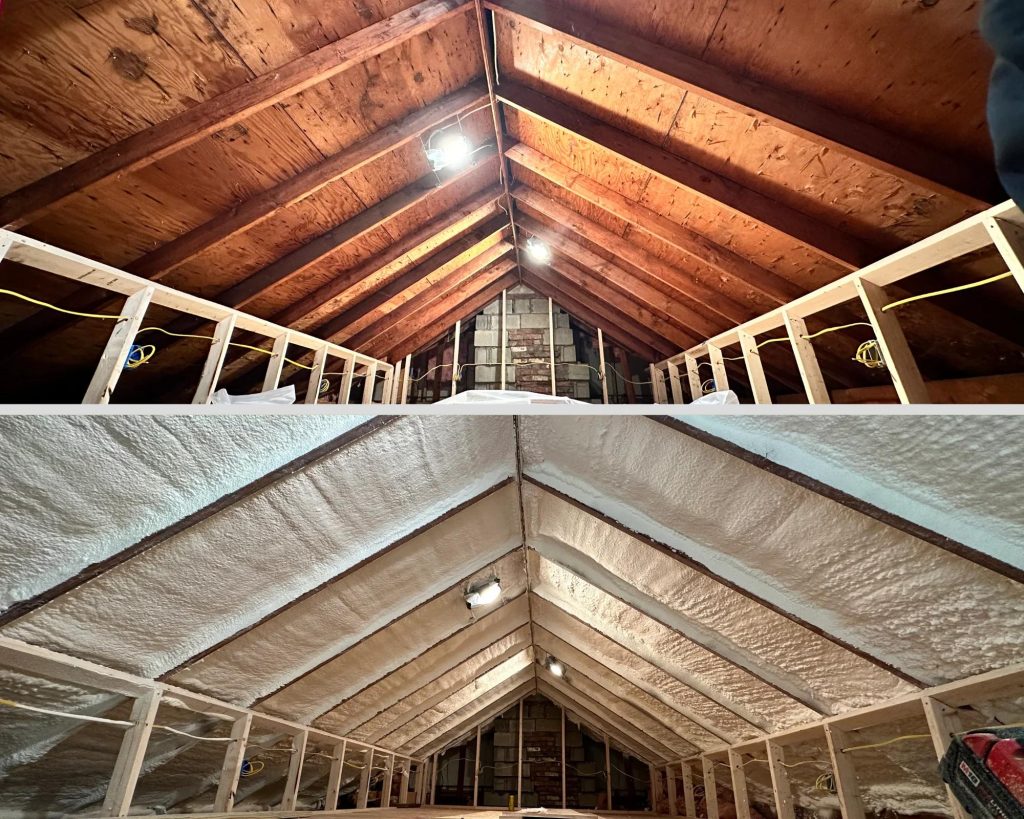
- Cost: $1.50 to $3.00 per square foot for DIY kits
- Best Use: Sealing gaps, attics, small problem areas
- Pros: Expands to fill cracks, provides excellent R-value, air sealing included
- Cons: Can be tricky to apply; more expensive per sq ft than fiberglass or cellulose
Tips for Best Results:
- Wear protective clothing and mask
- Test a small area first to gauge expansion
- Avoid over-spraying, it can warp surfaces
Reflective or Radiant Barrier Insulation – Best for Hot Climates
Reflective insulation is made from foil sheets and is especially effective in southern US climates.
Key Details: 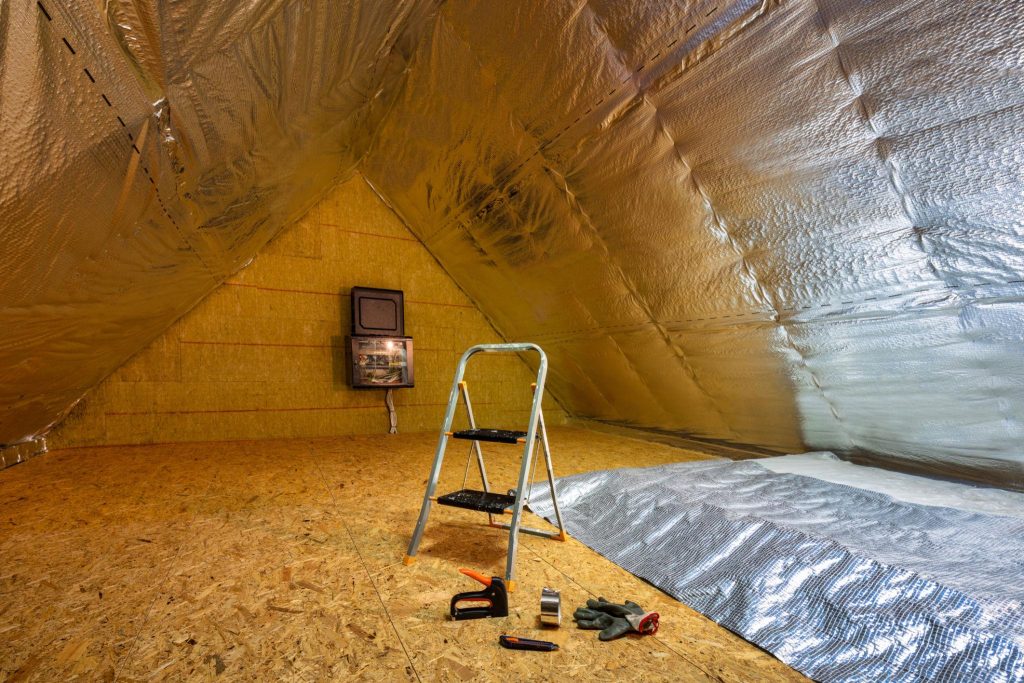
- Cost: $0.40 to $1.50 per square foot
- Best Use: Attics in hot climates, roofs
- Pros: Reflects heat instead of absorbing it, lightweight, easy to install
- Cons: Minimal effect in cold climates; must be installed with an air gap
Tips for Best Results:
- Install with the reflective side facing air space
- Use in combination with other insulation types for winter effectiveness
- Avoid direct contact with surfaces that can trap heat
Where to Buy Cheap Insulation in the US
Knowing which insulation to use is only half the battle. The next step is finding it at the best price without compromising quality. There are plenty of options across the US, both online and in-store.
Big-Box Home Improvement Stores
Stores like Home Depot, Lowe’s, and Menards carry a wide variety of insulation materials at competitive prices. These stores are ideal for:
- Fiberglass batts
- Foam board panels
- Reflective insulation
Tips for Shopping In-Store:
- Check for seasonal sales; spring and fall often have discounts
- Compare unit prices per square foot, not per roll or box
- Ask store associates for leftover or slightly damaged stock at discounted rates
Online Retailers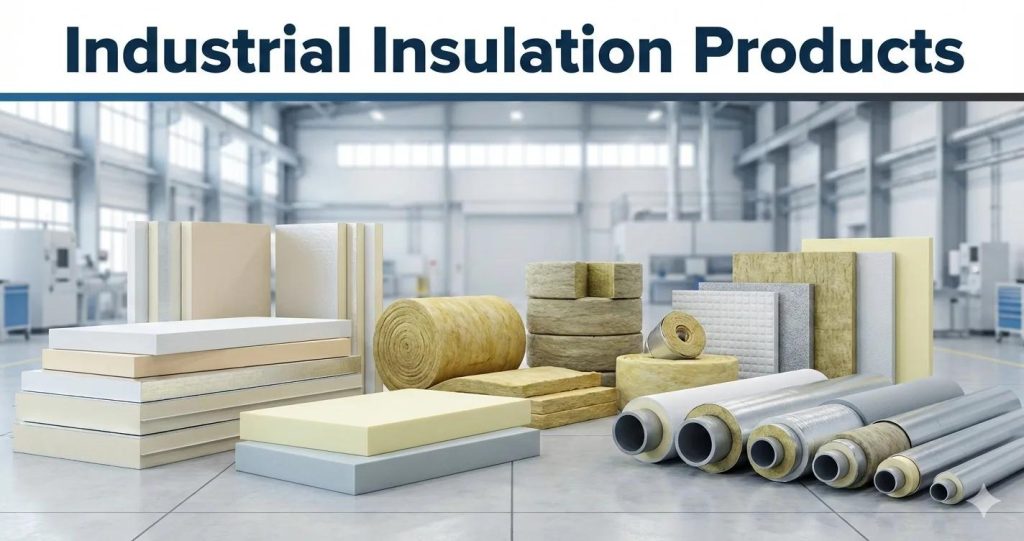
If you prefer convenience or live far from big stores, online retailers like Amazon, Walmart.com, and Lowes.com provide great options:
- Easy comparison of prices across brands
- Customer reviews for performance insights
- Delivery directly to your home
Tips for Online Shopping:
- Look for free shipping deals on bulk orders
- Read product reviews carefully for real-world results
- Check if DIY kits come with everything you need, including fasteners or adhesive
Specialty Insulation Suppliers
For larger projects or more specific insulation types, specialty suppliers are a hidden gem:
- Often sell in bulk for lower cost per square foot
- Offer cellulose and specialty foam options
- Provide expert advice on insulation selection
Tips for Working with Suppliers:
- Ask about delivery options for large rolls or boards
- Check if they have discounted returns or surplus stock
- Compare local supplier prices with big-box retailers for best deals
Local Hardware Stores and Discount Outlets
Smaller, local stores or discount outlets can surprise you with budget-friendly insulation, especially off-brand products:
- Fiberglass rolls or batts
- Foam sheets
- Radiant barrier foil
Tips:
- Inspect packaging for damage but ensure the material is intact
- Ask for bulk discounts or clearance deals
- Support local businesses while saving money
Insider Tips to Save Even More
- Buy in Bulk: Larger rolls or packs often reduce cost per square foot.
- Check Clearance Sections: Seasonal and surplus stock can be heavily discounted.
- DIY Kits: Some spray foam and reflective insulation kits are cheaper than hiring professionals.
- Compare Prices: Use price comparison apps or browser extensions to find the best deals online and offline.
- Coupons & Promotions: Home improvement stores frequently offer printable or digital coupons.
The Bottom Line: Whether you shop in-store or online, the key to cheap insulation is knowing exactly what you need, where to buy it, and how to maximize savings without sacrificing quality.
Price Comparison Table for Cheap Insulation
To make choosing cheap insulation easier, here’s a comprehensive table comparing popular US options. It includes cost per square foot, R-value, best use cases, and pros/cons, giving homeowners a clear view of value vs performance.
| Insulation Type | Typical Cost (US $/sq ft) | R-Value | Best Use | Pros | Cons |
|---|---|---|---|---|---|
| Fiberglass Batts | 0.30 – 1.50 | 2.9 – 3.8 per inch | Attics, walls | Affordable, widely available, easy DIY | Can be itchy, gaps reduce efficiency |
| Blown Cellulose | 0.60 – 1.50 | 3.2 – 3.8 per inch | Attics, retrofitting walls | Eco-friendly, fills irregular spaces | Settles over time, may need top-up |
| Foam Board (Rigid) | 1.20 – 2.50 | 3.8 – 5 per inch | Basement walls, small projects | Lightweight, easy to cut, good thermal resistance | Gaps reduce efficiency, precise cutting needed |
| Spray Foam (DIY Kits) | 1.50 – 3.00 | 3.5 – 6.5 per inch | Sealing gaps, attics, walls | Expands to seal, high R-value, air sealing included | Tricky to apply, more expensive per sq ft |
| Radiant Barrier / Foil | 0.40 – 1.50 | Reflective, varies by installation | Attics in hot climates | Reflects heat, lightweight, easy install | Minimal effect in cold climates, needs air gap |
How to Read This Table
- Cost per Square Foot: Compare material cost without labor (DIY-friendly focus).
- R-Value: Helps assess thermal resistance; higher numbers = better insulation.
- Best Use: Shows where each material works most effectively.
- Pros & Cons: Highlights practical considerations beyond just price.
This table allows homeowners to quickly scan and choose the most cost-effective insulation for their project.
Key Takeaways from the Table
- Fiberglass and cellulose dominate as affordable options for large areas.
- Foam board is perfect for small projects or walls that require precise insulation.
- Spray foam excels at sealing gaps, though it costs more per square foot.
- Radiant barriers are ideal in hot climates but need pairing with other insulation for winter.
How to Install Cheap Insulation Properly
Proper installation is the difference between insulation that saves you hundreds and insulation that barely works. Even the cheapest materials can deliver excellent results if applied correctly.
Preparing Your Space
Before you start:
- Clear the area: Remove debris, old insulation, or anything blocking access.
- Seal major gaps: Caulking around windows, vents, and doors helps prevent air leaks.
- Check for moisture: Make sure there’s no water leakage; insulation will fail if wet.
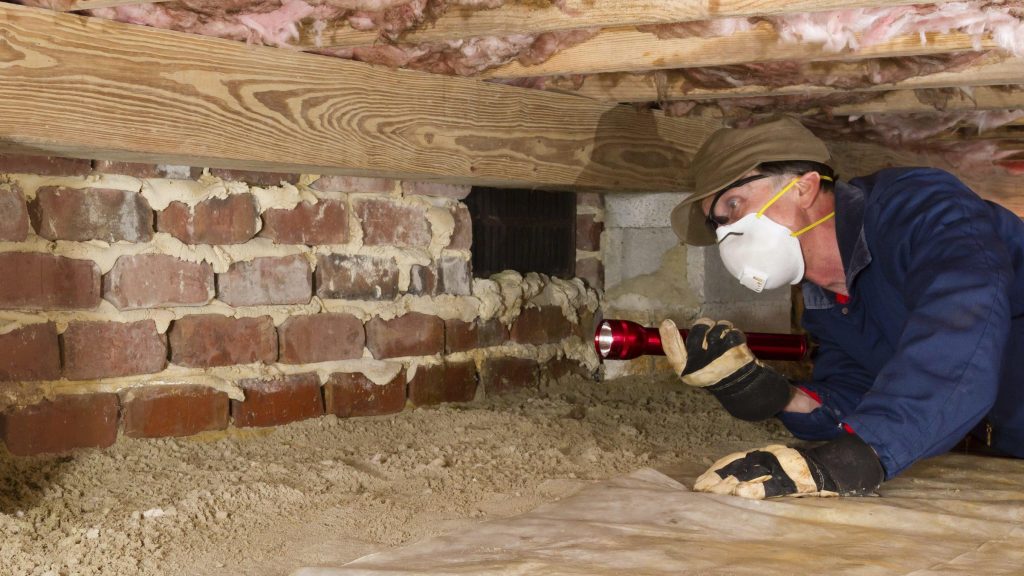
- Wear safety gear: Gloves, mask, and eye protection are essential for fiberglass or cellulose.
Installing Fiberglass Batts
- Measure the space carefully and cut batts to fit snugly.
- Place batts without compressing; compressed insulation loses R-value.
- Fill wall cavities completely, leaving no gaps.
- Use wire supports or netting if necessary to keep insulation in place.
Tip: In attics, leave a small gap around recessed lights or fixtures for safety.
Installing Blown Cellulose
- Use a blower machine (can rent from home improvement stores).
- Start at the far end of the attic and work backward to avoid stepping on freshly blown material.
- Maintain a consistent depth to achieve the desired R-value.
- Top off uneven spots to prevent settling over time.
Installing Foam Board / Rigid Panels
- Cut panels precisely to fit between studs or walls.
- Seal all edges with tape or caulk to prevent air leaks.
- Stack layers if higher R-value is required, but stagger seams to minimize gaps.
Installing Spray Foam
- Test a small area first to gauge expansion.
- Apply in even layers, working slowly to avoid overflow.
- Allow foam to cure fully before trimming or covering.
- Seal all corners and gaps for maximum efficiency.
Installing Radiant Barrier / Foil Insulation
- Install reflective side facing an air gap to reflect heat effectively.
- Staple or secure foil to rafters or attic trusses without tearing.
- Avoid contact with surfaces that could trap heat.
- Combine with fiberglass or cellulose for winter insulation benefits.
Common Mistakes to Avoid
- Compressing insulation: Reduces R-value significantly.
- Leaving gaps or voids: Heat flows through uninsulated spaces.
- Ignoring moisture: Wet insulation loses effectiveness and can cause mold.
- Skipping air sealing: Cheap insulation alone won’t stop drafts.
- Not measuring properly: Improper fit reduces efficiency.
The Bottom Line
Cheap insulation only becomes truly effective when installed with care.
By following these steps:
- Your insulation will perform like a high-end alternative
- Your energy bills will drop noticeably
- Your home comfort will improve year-round
How Much Money Can You Save With Cheap Insulation
Installing cheap insulation may sound like a small upgrade, but it can dramatically reduce your energy bills and pay for itself over time. Let’s break down how much homeowners in the US can realistically save.
Average US Energy Costs
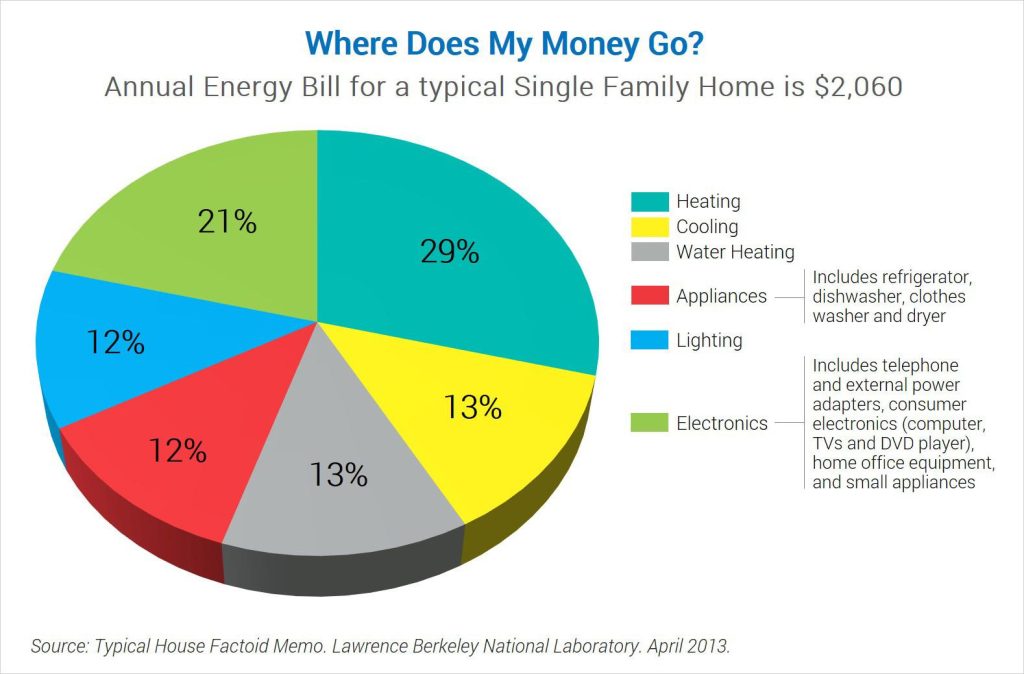
- Heating and cooling account for roughly 45% of a typical US home’s energy use.
- Average annual energy bills for US households (2025 data):
- Electricity: $1,600
- Natural Gas / Heating Fuel: $1,200
Insight: Even a small reduction in energy use can translate into hundreds of dollars saved per year.
Estimated Savings by Insulation Type
| Insulation Type | Average Savings per Year (USD) | Payback Period |
|---|---|---|
| Fiberglass Batts | $200 – $400 | 2 – 4 years |
| Blown Cellulose | $250 – $450 | 2 – 4 years |
| Foam Board | $200 – $350 | 3 – 5 years |
| Spray Foam | $400 – $700 | 4 – 6 years |
| Radiant Barrier | $100 – $250 (in hot climates) | 3 – 5 years |
Explanation: Savings depend on climate, home size, insulation quality, and installation accuracy.
Even the cheapest options, like fiberglass batts or cellulose, often deliver a 2-4 year ROI in energy savings.
How Insulation Reduces Energy Costs
- Blocks Heat Transfer: Keeps warm air inside during winter and outside during summer.
- Seals Air Gaps: Prevents drafts and energy loss through leaks.
- Reduces HVAC Load: Your heating and cooling system runs less, extending its lifespan.
- Improves Comfort: Maintains a more consistent indoor temperature.
Long-Term Benefits Beyond Dollar Savings
- Increases home value: Energy efficiency is a selling point.
- Environmental impact: Less energy usage = lower carbon footprint.
- Comfort: Fewer drafts, less noise, more consistent temperature.
- Prevents moisture issues: Proper insulation reduces condensation and mold risk.
Tips to Maximize Savings
- Combine cheap insulation with air sealing for maximum efficiency.
- Focus on attics and walls, as these areas are major energy loss points.
- Upgrade older insulation—even modest improvements pay off quickly.
- Use reflective or radiant barriers in hot climates to cut AC costs further.
The Bottom Line
Cheap insulation is not just a budget-friendly choice, it’s a smart investment. Properly installed, even the most affordable options can:
- Cut energy bills by hundreds per year
- Pay for themselves in a few seasons
- Improve home comfort and efficiency
Frequently Asked Questions About Cheap Insulation
Q1: Does cheap insulation really work as well as expensive options?
Answer:
Yes; if installed correctly. Cheap insulation like fiberglass or cellulose can deliver nearly the same R-value and energy savings as premium options. The key is proper installation and air sealing.
Q2: Which cheap insulation is best for attics?
- Fiberglass batts for DIY installation
- Blown cellulose for irregular or hard-to-reach spaces
- Spray foam if sealing air leaks is a priority
Tip: Combine options for maximum efficiency; fiberglass for coverage, spray foam for gaps.
Q3: Can I install cheap insulation myself?
- Yes; many options are DIY-friendly.
- Fiberglass batts, foam boards, and blown cellulose (with rented blower) are suitable for homeowners.
- Spray foam can be DIY but requires caution and protective gear.
Tip: Follow manufacturer instructions closely for safety and performance.
Q4: How do I choose the right insulation for my climate?
- Cold climates: Focus on R-value and coverage; fiberglass or cellulose works well.
- Hot climates: Consider radiant barriers or reflective insulation in attics.
- Mixed climates: Combine fiberglass or cellulose with air sealing for year-round efficiency.
Q5: How much can I really save with cheap insulation?
- Annual savings: $200–$450 depending on material, home size, and climate
- Payback period: Often 2–4 years for fiberglass or cellulose, longer for targeted spray foam
- Tip: Always combine with air sealing for maximum savings.
Q6: Do I need to replace old insulation?
- Only if it’s damaged, wet, or severely compressed.
- Adding cheap insulation on top of existing layers is often more cost-effective.
- Ensure moisture problems are resolved before adding new insulation.
Q7: Is cheap insulation safe for my home?
- Most common materials (fiberglass, cellulose, foam boards) are safe when used properly.
- Precautions: Wear gloves, masks, and goggles during installation.
- Ensure proper ventilation and avoid contact with moisture-sensitive areas.
The Bottom Line
Cheap insulation doesn’t mean low performance. Homeowners who:
- Pick the right type
- Install it correctly
- Combine it with air sealing
…can achieve energy efficiency, comfort, and long-term savings comparable to high-end materials.
Conclusion
Cheap insulation is more than just a budget-friendly option, it’s a smart, practical investment that pays for itself over time. From fiberglass batts to blown cellulose, foam boards, spray foam, and radiant barriers, each type offers unique benefits depending on your home, climate, and project size.
Key Takeaways
- Cost-Effective Options Work: Properly installed cheap insulation can rival premium materials in performance.
- Installation Matters Most: Even the cheapest materials fail if gaps, compression, or moisture issues are present.
- Energy Savings Are Real: Expect to save hundreds per year, with most materials paying for themselves in 2–4 years.
- DIY-Friendly: Many options are easy for homeowners to install, saving on labor costs.
- Climate-Specific Choices: Use radiant barriers in hot climates, high-R-value fiberglass or cellulose in colder areas.
Next Steps for Homeowners
- Assess Your Home: Identify attic, wall, and basement areas needing insulation.
- Pick the Right Material: Use the price comparison table to select the most cost-effective option.
- Install Properly: Follow the detailed installation guide to maximize energy savings.
- Combine with Air Sealing: Seal gaps, cracks, and leaks to boost efficiency.
- Track Savings: Monitor your energy bills to measure ROI.
Final Thoughts
Investing in cheap insulation is one of the easiest ways to lower energy bills, improve comfort, and increase your home’s value. By carefully choosing the right type, sourcing it smartly, and installing it properly, you can achieve big results on a small budget.
- Comment below with the insulation type you plan to use!
- Share your DIY insulation experience and tips with other homeowners.
- Subscribe for more energy-saving and home improvement strategies tailored for US households.